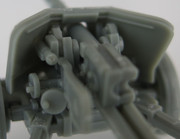
Author Topic: 280059 PaK 40 AT Gun with Crew  (Read 8922 times)

Rubicon Models

  • Administrator
  • Colonel
  • *****
  • Posts: 3,863
    • View Profile
280059 PaK 40 AT Gun with Crew
« on: January 19, 2018, 12:57:33 am »
Assembly Instruction for PaK 40 AT Gun with Crew


Last Update: 180118

Swamprat33

  • Private
  • *
  • Posts: 66
    • View Profile
Re: 280059 PaK 40 AT Gun with Crew
« Reply #1 on: February 18, 2018, 08:24:49 am »
Hi Rubicon, just wanted to point out a mistake in the Pak40 instructions.
I just built mine today, and part A25 is not mentioned, but needs to be attached to the gun barrel A14 in step 01.
The diag in step 1 shows these 2 parts joined but A25 is not mentioned.

I figured it out in a few secs and really enjoyed building the kit which looks great.
Cant wait to get it painted.
Cheers
Tim

Tracks

  • Sergeant
  • ***
  • Posts: 670
    • View Profile
Re: 280059 PaK 40 AT Gun with Crew
« Reply #2 on: March 30, 2018, 04:27:20 pm »
Swamprat33, what a good idea to address this mistake here. I had touched on it on my "showcase" post, but adding this information here might help others. Especially if they want to double check.

The following text is "cut and paste" from other post:
Quote
There is one mistake in the instructions. It was easy to figure out, so even for a beginner is shouldn't cause too many issues. Parts A14 and A25 are already shown assembled and are collectively labelled part A14. Before "Step 1", you have a "Step 0", and that is to glue parts A14 and A25 together.

New diagram
« Last Edit: April 16, 2018, 10:24:40 pm by Tracks »

Tracks

  • Sergeant
  • ***
  • Posts: 670
    • View Profile
Re: 280059 PaK 40 AT Gun with Crew
« Reply #3 on: July 10, 2018, 12:45:32 am »
After assembling yet another Pak-40, I should make a note about part A18 since the instructions are not clear.

The gun sight (part A18) should line up with the square view port on the gun shield (part A20). I recommend that you glue the gun shield on last after you assemble all the other parts in step 1, but if you want to add part A18 after gluing part A20, have a pair of tweezers handy.

The square shaped view port on the gun shield (A20) is made in a closed position (shutter is closed), but with care it can be modified to be in an open position. A true die-hard modeller would cut out the square view port on part A20 if the gun is being built as a deployed AT-Gun ready for action.