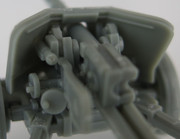
Here is a detailed picture of my PaK 40 focusing on the gun sight (part A18).

Note that the gun sight (part A18) should line up with the square view port on the gun shield (part A20). I recommend that you glue the gun shield on last after you assemble all the other parts in step 1, but if you want to add part A18 after gluing part A20, have a pair of tweezers handy.
The square shaped view port on the gun shield (A20) is made in a closed position (shutter is closed), but with care it can be modified to be in an open position. A true die-hard modeller would have cut out the square view port on part A20 if the gun is being built as a deployed AT-Gun ready for action. However, I'm more of a gamer than a modeller. Also I couldn't wait to assemble the PaK 40 AT-Gun and only thought of it after I finished assembling the model.
Rubicon Models' PaK 40 model kit is so much better than all of my metal/pewter PaK 40s (Bolt Action/Warlord, Black Tree, or Artizan) that I plan to replace them all! Also, not only is the Rubicon PaK 40 AT Gun more accurate, better detailed, and overall looks much better, but its also so much easier to assemble than the pewter/metal kits!
There is also the conversion possibilities! Highly recommended that you get at least a couple of the Rubicon Models PaK 40 AT-Gun plastic model kit.
I still do not have the PaK 38 model kit - these were not shipped and was told they are not available at the time of order. If they are as good as the PaK 40 model kit, then it will be worth the wait. Sadly though, I have to wait. It is okay because I can always proxy my PaK 40s as 38s until that time comes.