First, (@SheriffSherman) your work on the muzzle end looks great. I wouldn't change a thing.
I mostly made the reference to the other thread for the new members. Several people have added some good info and suggestions (including you SheriffSherman). Now that Rubicon Models offers so many versions of the M4 Medium, I just had to shamelessly point out that older thread.

As for the collar ring, well, originally I was going include the cover (ring + thread protector), but later changed my mind after doing some research. I noticed that in some WW2 photos they didn't use the thread cover, and you could clearly see the threads (and collar ring). So I said, "
I'll do that instead, but without cutting the fine threads" because I build my models for gaming and not for contests. Yes, I still try to make my models look okay, but I tend to skip things like adding very fine threads.
Okay, back to the collar ring. I started out by making a ring from the end of a piece of plastic pipe. First I did some careful shaping before cutting the tip of the pipe to make the ring. After slipping it onto the barrel, I used a little Tamiya extra thin to tack it into place. I don't recall if I had to do any smoothing afterwards.
Side Note:
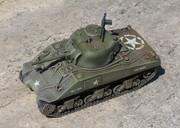
My first
M4 Medium was the Italeri/Warlord plastic model kit:
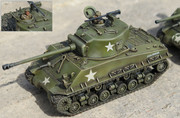
But this was the very first Rubicon Models
M4 Medium I assembled and painted: