Show Posts

This section allows you to view all posts made by this member. Note that you can only see posts made in areas you currently have access to.


Messages - RFT

Pages: 1 [2]
16
Work In Progress / Re: King Tiger - More 3D Drawings 190621
« on: June 23, 2019, 04:03:29 am »
I like this. It’s good to see ambition and pushing things forward in the scale.
I don’t play Germans in the scale but for a good price I could see myself picking this up anyway.

How will the turret attach to the hull ina way that’s nicely scale and also suitable for gaming?

I would love this to succeed and see other kits in the same vein for the Sherman.
17
Showcase & Gallery / Re: Magnetising a Sherman
« on: March 06, 2019, 11:19:12 pm »
It depends on the donor kits.

My donors are the M4A3 76 set* and the composite set - so because I built the 76 with HVSS I have the unused A12-17 (VVSS bogie backs) and extended tracks that came with that kit and the ones that came with the composite. If you were to do it off a single kit, then you would need to do as you say and choose a different break point. doing that might be slight easier in fact as you could probably hide the mags inside the wheels.

One other issue that I've not yet mentioned is that you only get one each of A20/A21 (inner drive sprocket), so one track versiion will have to go without  or I'll have to scratchbuld it out of plasticard. (though It's not very visible once the tank's together so may be skippable)

*annoyingly, since having this idea, I can't find my leftover parts from this set so I'm currently doing this in preparation of actually having the parts turn up.

18
Showcase & Gallery / Re: Magnetising a Sherman
« on: March 06, 2019, 08:22:22 pm »
Tracks

required:
8 5x1 mm circular magnets
plasticard scraps
5mm drill bit.

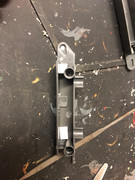
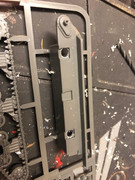
The size of the bogies and the hull recesses they fit into makes this step really simple. I drilled into the front and rear recesses on the hull so the hole went all the way through.


After some cleanup, I then used plastic cement to attach a small backing plate to the hole inside the hull.


Once this had dried in place, I superglued the magnets into the hull, making sure to keep the same polarity. the plastic is quite thick so the magnet will be nicely below the recess mating surface.

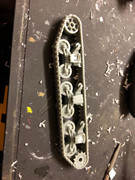
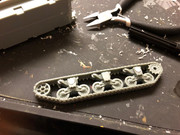
I then assembled the tracks and then drilled a recess into the front and rear bogies. this is a little more awkward than the hull because the recess is almost as big as the bogie (so the centre of the is a hole, but the outer areas are drilling into the walls) and we need to ensure the mag ends up flush with the old surface.


once done, test fitted magnets to ensure that they were flush and glued them in taking extreme care over polarity.

I've found the best way to keep polarity in order is to but the magnets in a stcak on somethign steel, then mark the top of the magnet in the stack with a sharpie pen as each one is used. this doesn't stop them sneakily flipping over when being maneuvered into a recess, but I can at least see which way is up.


19
Showcase & Gallery / Magnetising a Sherman
« on: March 06, 2019, 07:50:58 pm »
A month or so ago, I played a d-day scenario of Bolt Action against a friend, and it bugged my that my only sherman (a very late war easy-eight) was the only thing I had, so I decided to get a second sherman more suitable for summer-autumn 44.

Remembering the modular nature of shermans (and rubicon's kits), I decided that it would be cool if I could make a single model that could have VVSS, VVSS with "duckbill" extended track, be a 75 or 105, and be able to optionally fit the deep-wading trunking set.

I already had a big stack of 5mm magnets left over from doing turrets for my team yankee, so this thread is going to document what I did, and any problems that arise along the way.

 It's not going to be possible for 100% accuracy in places, but so far it's a nice exercise in getting the most out of the kits.

I've chosen the M4 composite sherman as it's my second-favourite sherman look after the very late flat front, but a lot of this will port straight over to the M4A2 and M4A3.

20
Introduce Yourself / Re: Introduce Yourself Here...
« on: March 05, 2019, 05:19:24 pm »
I'm Richard, I'm from warwickshire in the UK and I'm mostly here for building tips and so on.


Pages: 1 [2]